Description
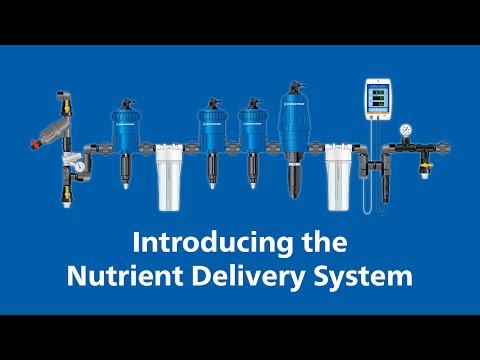
The Starter Kit contains a filter to protect your system ; the neccesary valves so you can carry out maintanence on your filter; a secondary output for water (e.g to make up stock concentrate); check valves.
Here's what's included and why it’s a must-have:
Key Features ✨
- Protective Filter: Shields your system from debris and contaminants, ensuring longevity.
- Maintenance Valves: Makes it easy to carry out filter maintenance without disrupting your system.
- Secondary Water Output: Convenient for tasks like making up stock concentrate or other uses.
- Check Valves: Prevents backflow and ensures the system operates reliably.
Important Details 🔍
- Compatible Design: Works with any booster water pump.
- No Pressure Regulator Included: This kit doesn’t come with a pressure regulator, as it's not needed with pumps like the DAB pump, which provide constant, preset output pressure.
- Pressure Advisory: For systems without a DAB pump, ensure your pump doesn’t exceed 85psi, as higher pressures can damage your injectors.
Note ⚙️
The parts you receive may look slightly different from the displayed images, but their fit and function will remain the same.
You can purchase the Complete Dosatron Nutrient Delivery System - and save money to boot! Or, you can buy the 3 components separately (Starter, 4 x Hobby Dosatron Injectors and Monitoring Kit )
Documentation
- Hobby User Guide
- Hobby Injector Specs
- Monitoring Kit Specs
- Starter Kit Specs
- Expansion Doser Guide
- Mixing Chamber Guide
Instructions
- Wrap 5 to 6 turns of PTFE Tape on all threads. Make sure to wrap clockwise to prevent the tape from unravelling
- Connect the ¾” x ¼” Reducing Nipple to one port of the cross, followed by the pressure gauge and set aside.
- Connect a Barrel Nipple to the union side of a ¾” PVC Single Union Threaded Ball Valve then connect an elbow to the Barrel nipple.
- With the arrow facing down, connect the ¾” BSP Male Y Filter (39-00-20) to the ¾” PVC Single Union Threaded Ball Valve.
- Add the female socket (021.013.03) to the other end of the Y filter (39-00-20).
- Attach the cross assembly to the Barrel Nipple
- Insert a Hexagon nipple (021.273.03) on each of the two openings left on the Cross.
- With the union side up, attach the Ball Valve to the bottom Nipple and connect the hose adaptor to the Ball Valve.
- Attach an elbow to the Nipple in the centre of the Tee and attach a Barrel nipple to the elbow.
- With the arrow facing up, connect the Check Valve (021.673.03Q) to the Barrel


